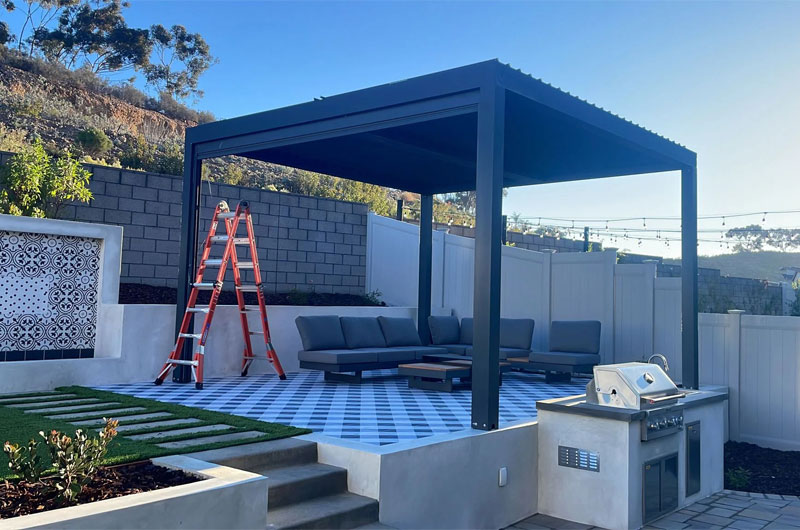
Aluminum louvered pergolas have become a popular choice for modern outdoor living spaces.
They offer adjustable shade, weather protection, and a sleek architectural look, all while requiring minimal maintenance.
While professional installation is always an option, many homeowners and contractors choose to install aluminum louvered pergolas themselves thanks to modular designs and pre-engineered components.
Below is a clear, step‑by‑step guide to help you install an aluminum louvered pergola safely and correctly.
Step 1: Plan Your Pergola Location
Proper planning is crucial before starting the installation process.
Start by selecting a flat, stable area in your yard, patio, or deck. Aluminum louvered pergolas can be freestanding or wall-mounted, so confirm which configuration you are installing.
Make sure the location allows enough clearance for the louvers to rotate fully and for rainwater to drain properly.
Key planning checks:
- Measure the installation area accurately
- Confirm pergola dimensions match the space
- Review local building codes and any HOA regulations in advance.
- Identify underground utilities before drilling
A well-prepared site prevents alignment issues and structural problems later.
Step 2: Prepare the Foundation
A strong foundation is critical for stability and safety.
Most aluminum louvered pergolas are anchored to concrete footings, concrete slabs, or reinforced decks.
If installing on soil or grass, you will need to pour concrete footings first and allow them to cure fully before installation.
Foundation preparation tips:
- Ensure the surface is level
- Mark anchor points precisely
- Let the concrete cure for a minimum of 48–72 hours
- Use expansion bolts or anchor bolts recommended by the manufacturer
Skipping proper foundation preparation can lead to shifting, vibration, or wind damage.
Step 3: Unpack and Organize Components
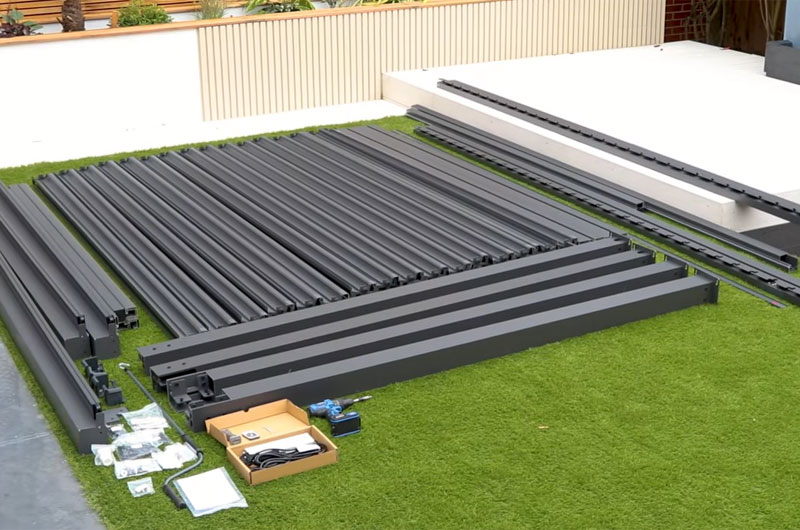
Before assembly, unpack all pergola components and check them against the manufacturer’s parts list.
Typical components include:
- Vertical posts
- Beams and gutters
- Louver blades
- Motor or manual control system
- Fasteners, brackets, and anchor bolts
Lay all parts on a clean surface and group similar components together.
Step 4: Install the Vertical Posts
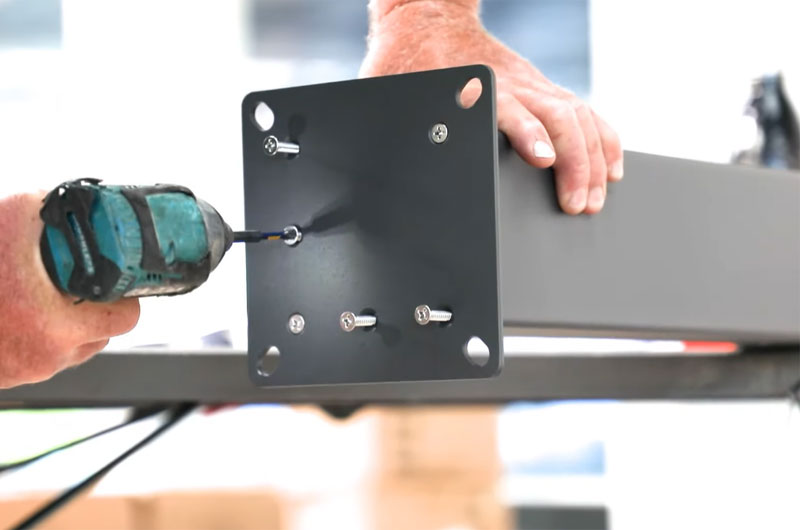
Begin assembly by installing the pergola posts.
Position each post on its marked anchor point and secure it loosely at first.
Use a level to confirm each post is perfectly plumb. Do not fully tighten bolts until all posts are aligned.
Important tips:
- Work with at least two people for safety
- Use temporary braces if needed
- Double-check spacing between posts
Accurate post installation ensures the frame remains square and stable.
Step 5: Assemble and Install the Beams
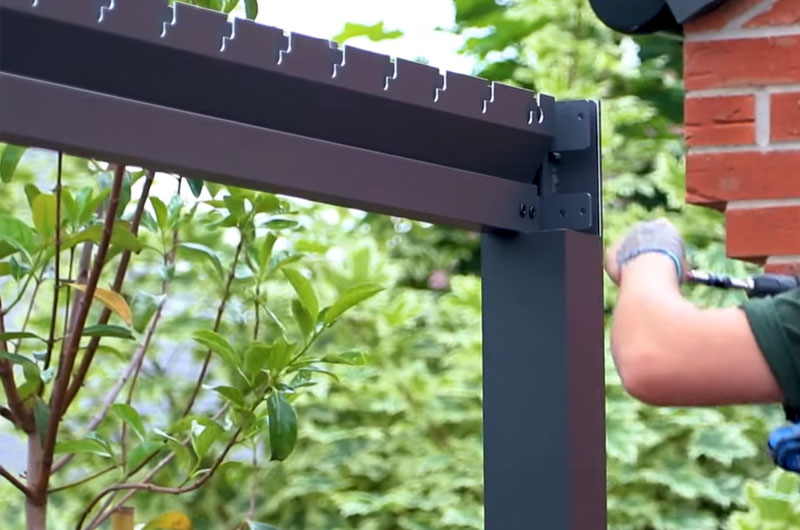
Then, secure the horizontal beams to the posts. Beams typically connect using pre-drilled holes and brackets.
Follow the manufacturer’s sequence carefully, as beams often support integrated drainage channels.
Steps to follow:
- Attach beams one side at a time
- Check corners for squareness
- Tighten bolts gradually and evenly
Once all beams are installed, recheck the entire structure for level and alignment before fully tightening all fasteners.
Step 6: Install the Louver System

The louver system is the core feature of an aluminum louvered pergola.
Depending on the model, louvers may be installed individually or as pre-assembled sections. Carefully insert each louver into its designated track or pivot point.
Louver installation tips:
- Follow the correct orientation for rotation
- Avoid forcing louvers into place
- Ensure smooth movement before proceeding
Proper louver alignment ensures consistent opening, closing, and weather protection.
Step 7: Connect the Control System
Aluminum louvered pergolas may use manual crank systems or motorized controls.
For manual systems:
- Attach the control rod or crank
- Test full open and close motion
For motorized systems:
- Connect wiring according to instructions
- Install the motor housing securely
- Pair the remote or wall switch
- Test functionality before final sealing
If electrical work is required, consider hiring a licensed electrician to ensure safety and code compliance.
Step 8: Install Optional Accessories
Many aluminum louvered pergolas support optional accessories that enhance comfort and usability.
Common accessories include:
- LED lighting strips
- Motorized side screens
- Sliding glass panels
- Ceiling fans or heaters
Add accessories only after the main structure is firmly in place. Follow accessory-specific instructions carefully to avoid interference with louver operation.
Step 9: Secure and Finalize the Structure
After all parts are installed, complete a final tightening of all bolts and anchors.
Final checks:
- Confirm all posts are plumb
- Ensure beams are level
- Test louver rotation and drainage
- Verify electrical components function correctly
This step ensures long-term stability and performance.
Step 10: Clean After Installation
After installation, clean the pergola to remove fingerprints, dust, and debris.
Basic maintenance tips:
- Rinse with water periodically
- Inspect bolts annually
- Keep drainage channels clear
- Lubricate moving parts if recommended
Proper care keeps your aluminum louvered pergola looking new and operating smoothly for years.